Yo, what's up! I'm here from a Dredger Discharge Pipe supplier, and today I wanna walk you through the process of installing a dredger discharge pipe. It might seem a bit daunting at first, but with the right steps and a bit of know - how, it's totally doable.
Pre - installation Preparations
Before you even start thinking about getting that pipe in place, you need to do some groundwork. First up, you gotta measure the area where the pipe is gonna go. A proper measurement is key. You don't want a pipe that's too long and has to be bent awkwardly or one that's too short and can't reach the required destination. Make sure you have all the necessary tools on hand. You'll probably need wrenches, clamps, and maybe some sealants.
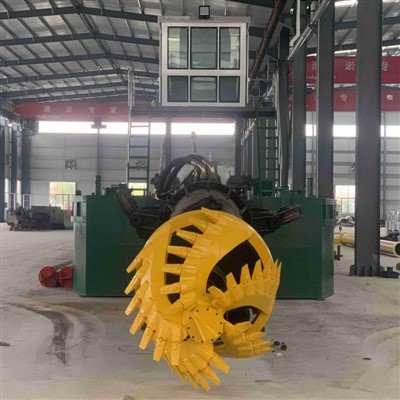
Another important thing is to check the quality of the dredger discharge pipe. As a supplier, I can't stress enough how crucial it is to have a good - quality pipe. A faulty pipe can lead to all sorts of problems down the line, like leaks and reduced efficiency. You should also take a look at the other components of the dredger. For example, the Cutter Head Of Cutter Suction Dredger and the Hydraulic System Of Dredger. These parts work in tandem with the discharge pipe, and any issues with them can affect the overall performance.
Choosing the Right Location
Picking the right spot for your dredger discharge pipe is super important. You need to consider the flow of the dredged material. The pipe should be installed in a way that allows for a smooth and continuous flow. If the pipe has too many sharp bends or is installed in an area with a lot of obstacles, it can cause blockages.
Also, think about the accessibility of the pipe. You'll need to be able to maintain and repair it if needed. So, don't install it in a place that's hard to reach. And make sure the ground or the structure where the pipe will be attached is stable. A shaky foundation can lead to the pipe shifting over time, which can damage it.
Assembly of the Pipe
Once you've got everything ready, it's time to start assembling the pipe. Lay out all the sections of the dredger discharge pipe in the order they'll be connected. Most pipes come with pre - drilled holes for easy connection. You'll use bolts and nuts to join the sections together. Make sure you tighten them properly, but don't over - tighten as it can damage the pipe.
After connecting the sections, you need to apply a sealant to the joints. This will prevent any leaks from occurring. A high - quality sealant is essential here. You don't want to have to deal with leaks later on, which can be a real pain in the neck.
Installation of the Pipe
Now, it's time to lift the assembled pipe into position. This can be a tricky task, especially if the pipe is long and heavy. You might need some heavy - duty equipment like cranes or hoists. Make sure the lifting equipment is in good working condition and that the operators are trained.


Once the pipe is in place, you need to secure it. You can use clamps to attach the pipe to the supporting structure. The clamps should be tightened enough to hold the pipe firmly but not so tight that they damage the pipe. Check for any misalignments at this stage. If the pipe is not aligned correctly, it can cause problems with the flow of the dredged material.
Connection to the Dredger
The next step is to connect the discharge pipe to the dredger. This is where the Dredge Pump comes into play. The dredge pump is responsible for pushing the dredged material through the pipe.
Make sure the connection between the pipe and the pump is secure. You can use gaskets to ensure a leak - proof connection. Check all the valves and fittings to make sure they are working properly. Any issues with the valves can disrupt the flow of the material.
Testing the System
After the installation is complete, it's time to test the system. Start the dredger and let it run for a while. Check for any leaks at the joints and connections. Monitor the pressure in the pipe. If the pressure is too high or too low, it could indicate a problem.
Also, observe the flow of the dredged material. It should be smooth and continuous. If you notice any blockages or irregularities, you need to stop the system and troubleshoot the issue. It could be something as simple as a small obstruction in the pipe or a problem with the dredge pump.
Maintenance Tips
Once the system is up and running, you need to keep an eye on it for maintenance. Regularly inspect the pipe for any signs of wear and tear. Check the joints and connections for leaks. Replace any worn - out parts as soon as possible.
Keep the pipe clean. Dredged material can build up inside the pipe over time, which can reduce its efficiency. You can use cleaning agents or mechanical cleaners to keep the pipe in good condition.
Conclusion
Installing a dredger discharge pipe is not an easy task, but by following these steps, you can ensure a successful installation. At our company, we're always here to help you out with any questions or concerns you might have about dredger discharge pipes. If you're in the market for high - quality dredger discharge pipes or need more information on installation and maintenance, feel free to reach out. We'll be glad to have a chat and discuss how we can meet your needs.
References
- General knowledge of dredger systems and pipe installation
- Industry standards and best practices for dredger equipment